Using Netdude
This chapter will give you an overview over the Netdude GUI and how to use it.
The Main Window
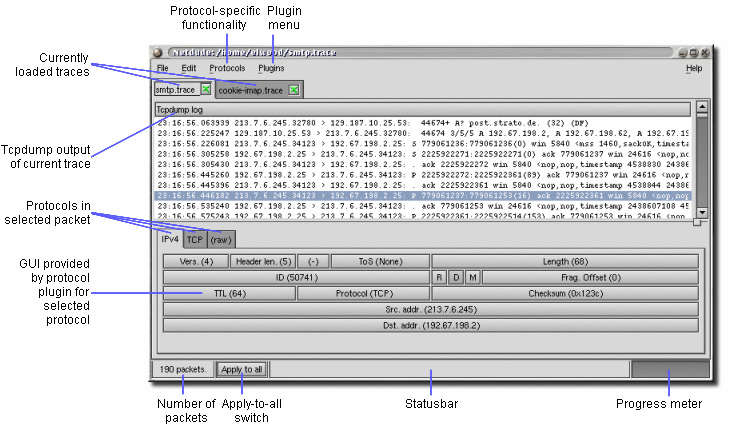
The main window of Netdude is shown below.

Netdude's main window.
Most things should be obvious -- the GUI is a regular MDI interface. Each trace is displayed in its own tab, indicated by the trace's file name. The close button on the tab is green while the trace is unmodified and turns red when packets get modified.
In each trace tab, the upper part of the window is occupied by the tcpdump output of the current trace. Left-clicking in the list selects packets, right-clicking pops up the Edit menu as a shortcut. The protocols contained in a packet are listed as tabs in the lower part, in nesting order from left to right. You can look at and edit the protocols by clicking on the corresponding tab.
By clicking on the buttons in the lower part of the window you can edit header field values. When you select multiple packets (using shift-click or control-click), modifications to a field will be applied to all the selected packets.
Apply-to-all Mode is convenient when you want to apply your changes to all packets. Instead of selecting all packets, you simply press the Apply-to-all button and any changes you make will affect all packets immediately.
Each field in a protocol header has a state, and protocol plugins can change these states to indicate cirtain circumstances. In the protocol plugins shipped with Netdude, incorrect checksums will appear red, while in situations where the correctness of a checksum cannot be determined (e.g. because not all data covered by the checksum is present), it will appear yellow.